The New User Interface – MYOB Acumatica
MYOB Acumatica Tips and Tricks #2A year ago, the upgraded version of MYOB Acumatica (formerly MYOB Advanced) came with a new User Interface (UI) as an option. Some clients may have been reluctant at the time to use the new User Interface for a lack of familiarity. Other clients may have upgraded but are not aware of the finer details with the new User Interface.
This blog is to provide some tips and tricks with the new User Interface so that you get the best out of using MYOB Acumatica. If you currently don’t have the new User Interface and would like it, please contact Kilimanjaro Consulting MYOB Acumatica Support on 1300 857 464 .
MYOB Acumatica New User Interface in 2020
In version 2020, the new User Interface will become mandatory. In preparation for this, you can switch to the new user interface by selecting the user ID located in the top right corner of the screen.

From the drop-down menu, select User Profile. MYOB Acumatica displays the User Profile dialogue.
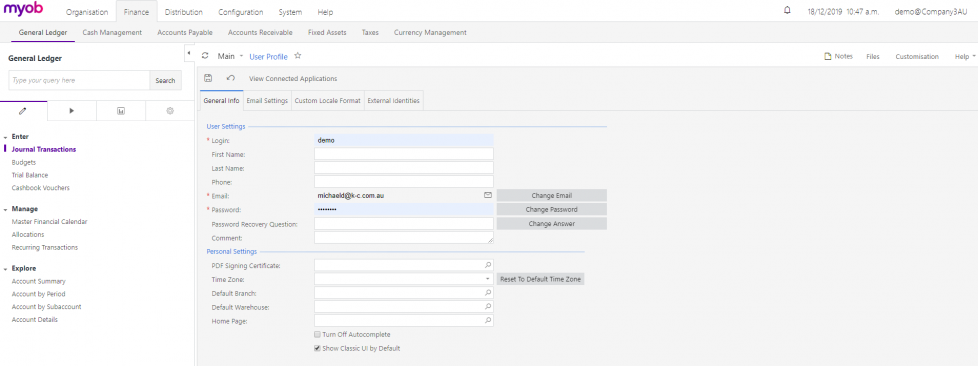
Disable the Show Classic UI by Default flag and save changes. MYOB Acumatica will refresh the page with the new UI.
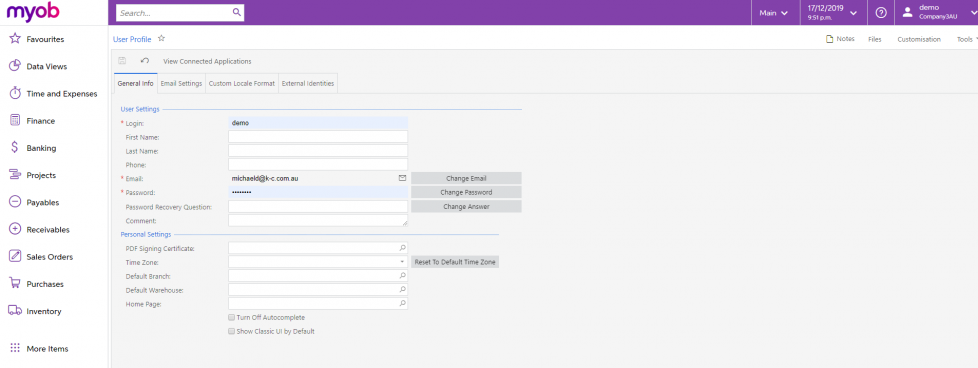
Any custom menu options in MYOB Acumatica will need to be added to the new UI. Please contact us for assistance on a
What features are included in the MYOB Acumatica New User Interface?
1. Quick Menu
Can’t find a menu item which you think should be there?
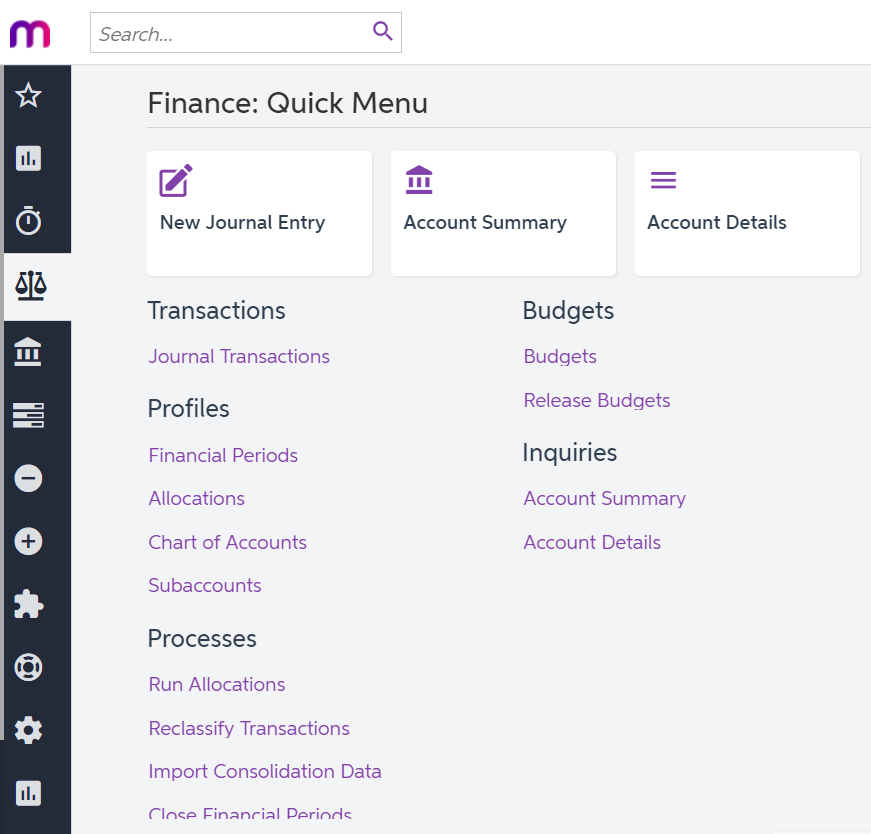
Check the quick menu!
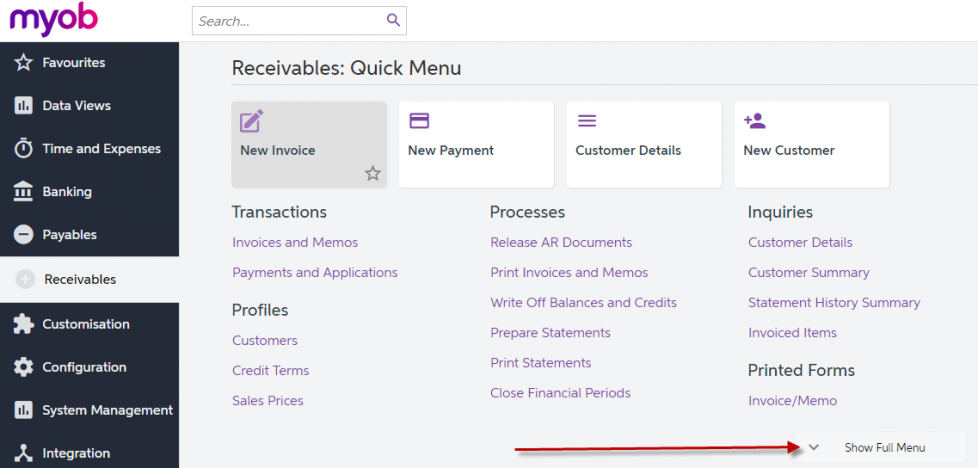
To add/remove from the quick menu, go to settings in top right corner:
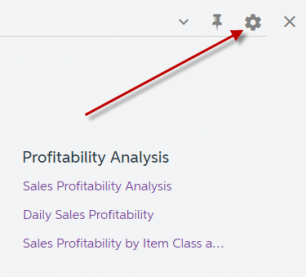
Then tick boxes of the items you want in your quick menu, and Exit to view Quick Menu:
2. Favourites
As with prior versions, you can click on the stars to add menu items to your “Favourites” menu at the top.
So, if you have trouble finding a menu option, once you’ve found it click on the star and you’ll never have trouble finding it again.
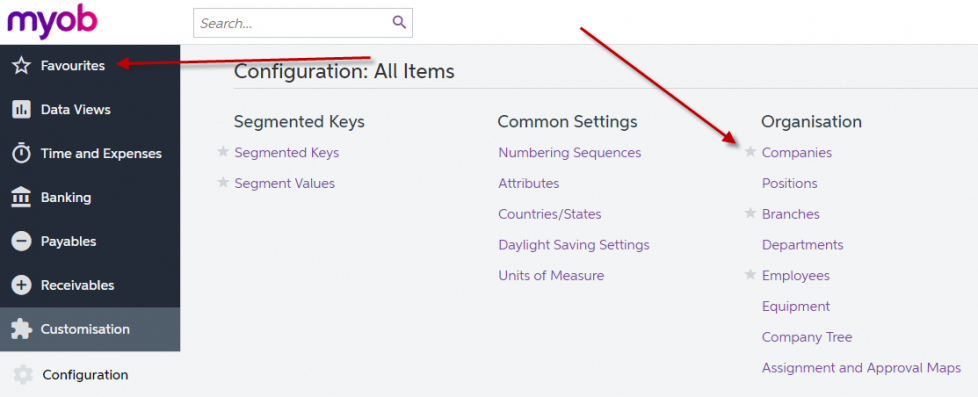
3. Pin to the Menu
If you use options under the “More Items” frequently, you may wish to pin these to the main menu. From then on it will stay in the first level of the menu on the left-hand side. Eg below pin the integration menu:

4. Search
If you still can’t find something, search for it.
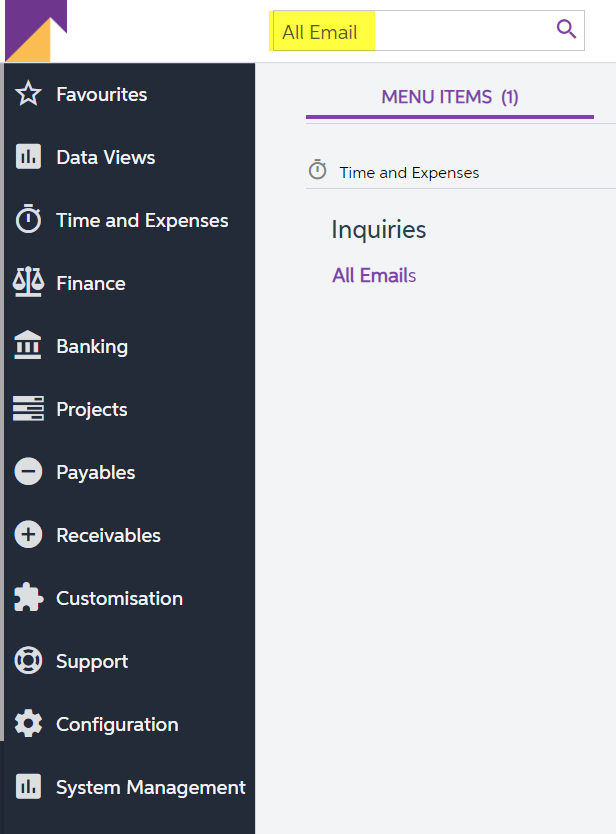
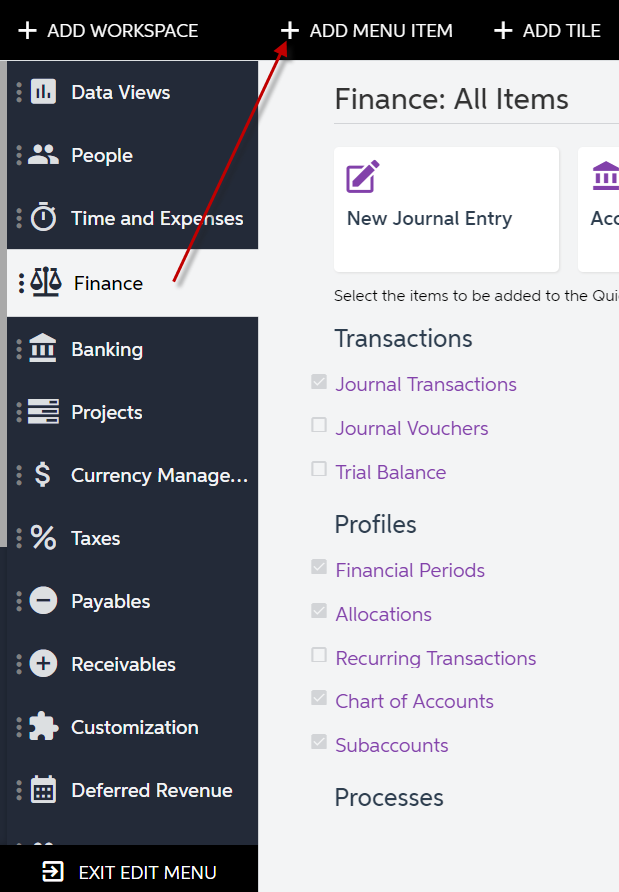
5. Add new item to the menu
Click on Edit Menu
Select a menu item eg Finance and then select + Add Menu Item

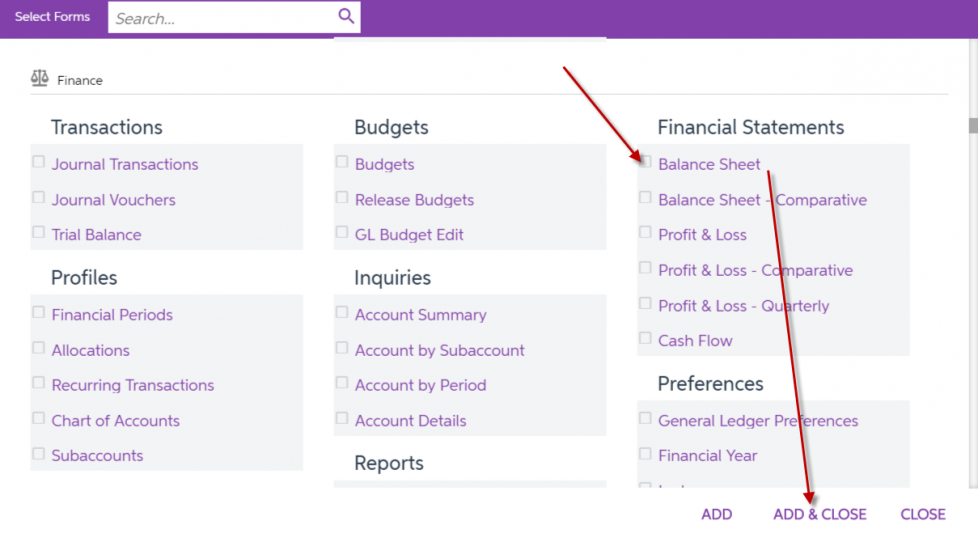
Find relevant menu items, tick, then select Add and Close.
6. Minimise the menu
Click on < to minimise the menu and release even more real estate to work with.

Interested in other ways to optimise MYOB Acumatica?
Check out our handy MYOB Acumatica Tips and Tricks blogs here:
- Generating On-Demand Statements in MYOB Acumatica
- The New User Interface – MYOB Acumatica
- Row-Level Security in MYOB Acumatica
- Generic Inquiries in MYOB Acumatica
- Fixed Assets in MYOB Acumatica
- Business Events in MYOB Acumatica
- Restricted use of Control Accounts in MYOB Acumatica
- Corporate Cards in MYOB Acumatica
- Matrix Items in MYOB Acumatica
- Restricted Visibility of Customer and Supplier Records
- Important features of reporting dashboards
- The Global Search Function in MYOB Acumatica
- Learn to Streamline your Intercompany Sales
- Simplify Your Cross-Company Sales
- Adding one-off public holidays to MYOB Acumatica Payroll
- Deferral Schedules in MYOB Acumatica
- Keyboard shortcuts to improve efficiency in MYOB Acumatica
- 3 Steps to Archive Documents in MYOB Acumatica
- How to streamline EOFY reconciliations in MYOB Acumatica
MYOB Acumatica Ultimate Compilation of Tips and Tricks eBook
Download nowWe hope these tips and tricks were helpful to you! If you have any questions about the new User Interface in MYOB Acumatica, our friendly team is here to help. Call us on 1300 857 464 (AU) or 0800 436 774 (NZ), or send us an email.
Alternatively, for a comprehensive overview of all of our best MYOB Acumatica ‘hacks’ in one place, you can download our PDF from the panel on the right – The Ultimate Compilations of Tips and Tricks!

